- Home
- About KEDA
- Corporate Culture
-
Products
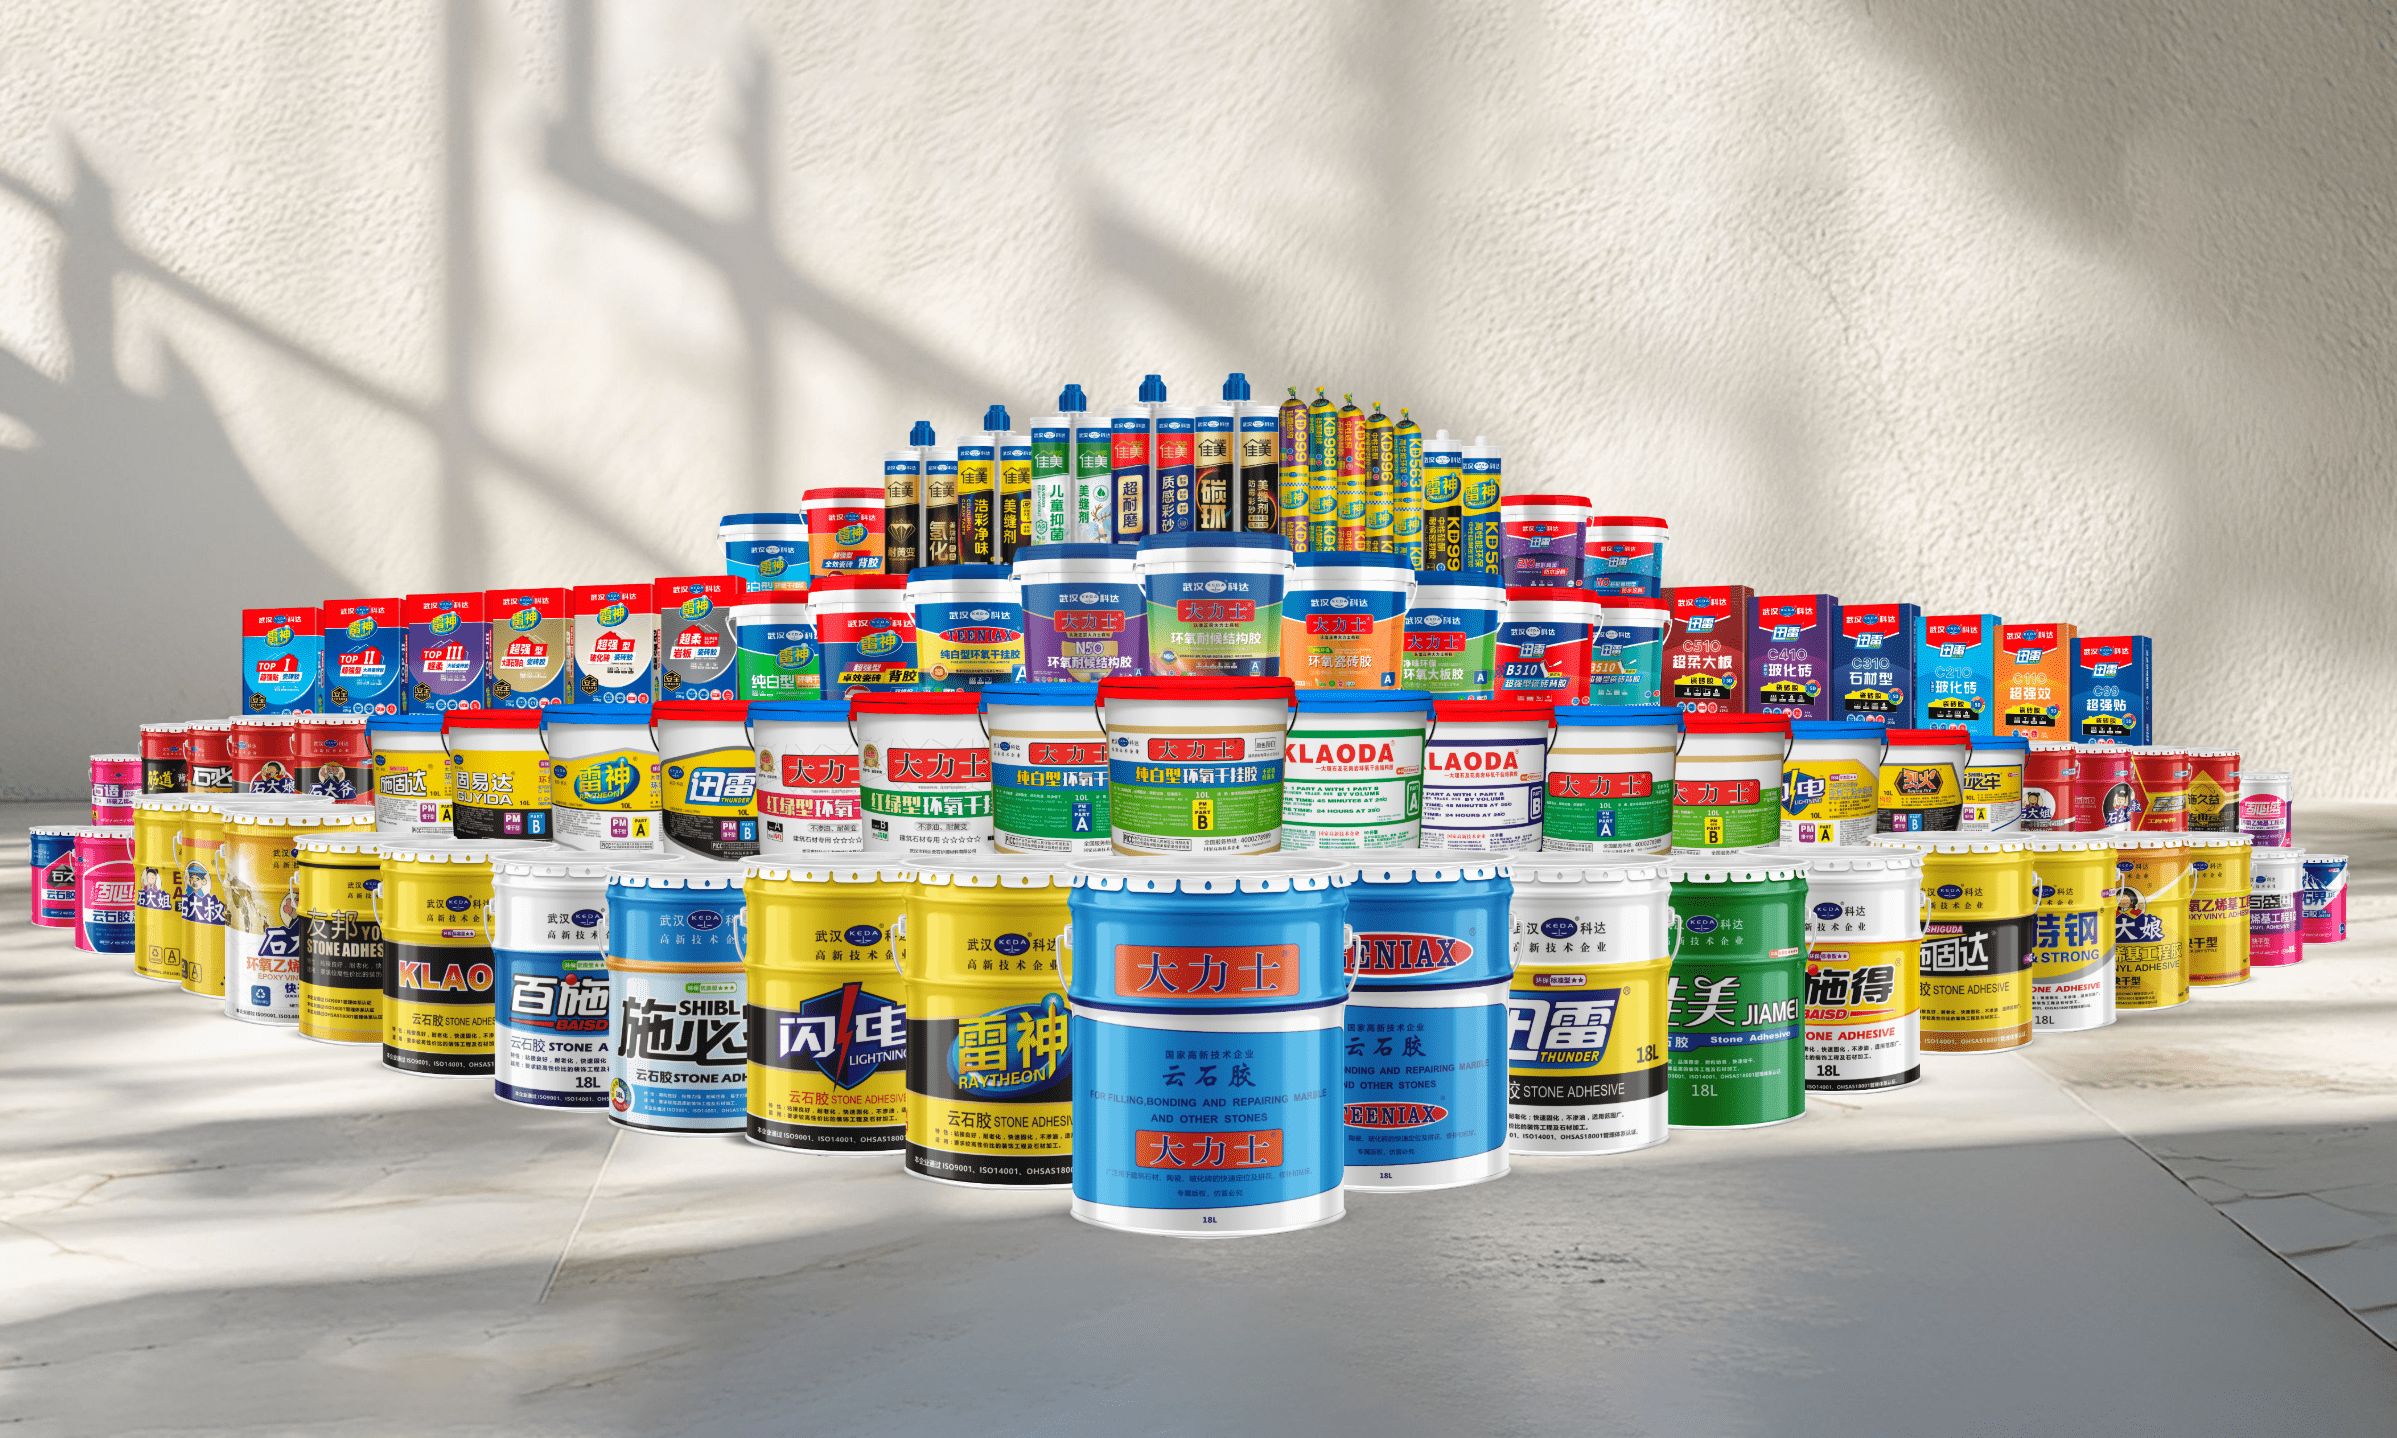
Master the core bonding technology
Professionalism: deep plowing bonding technology to achieve the same life of adhesives and buildings.
altruism: the global strict selection of raw materials and the construction of national formula library, the source to ensure quality.
Long-term doctrine: one-time bonding, life-long peace of mind, with technical ingenuity to protect the life of the building, enabling sustainable development. - Cases
- Shibilao Dry Adhesive
- Cooperation
- Careers

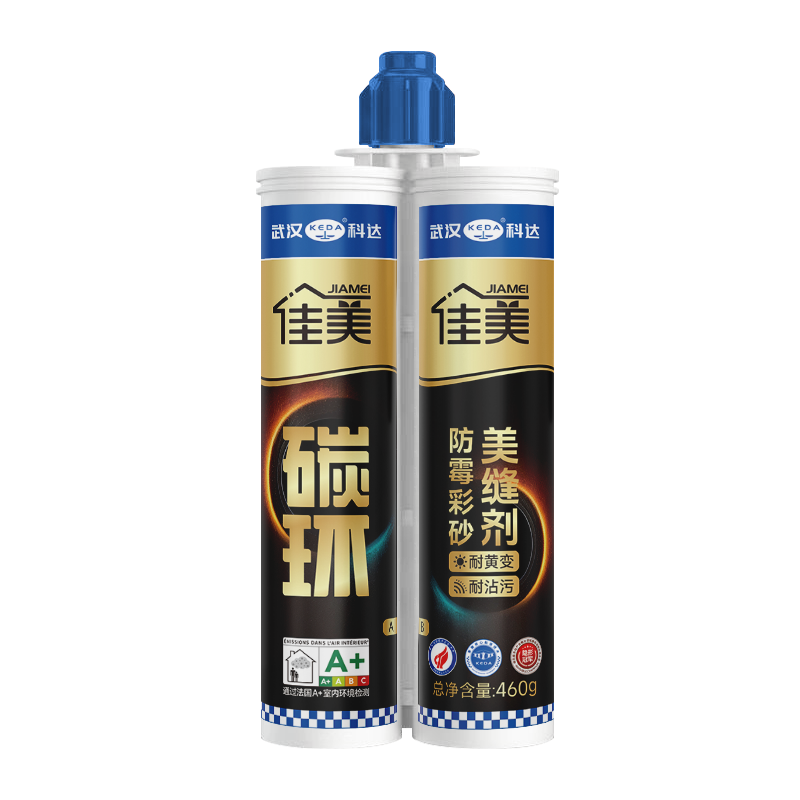

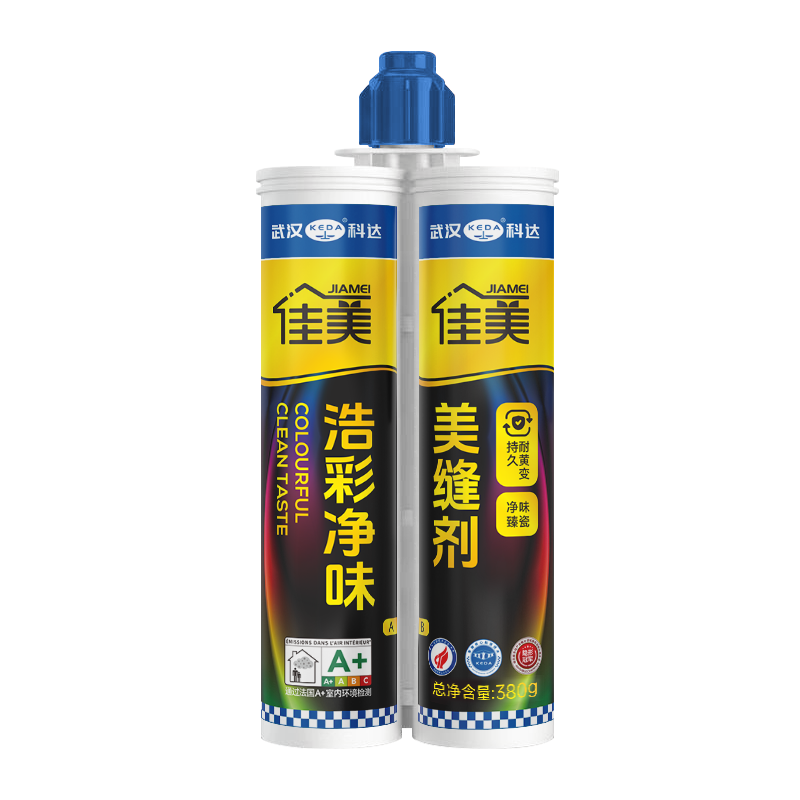
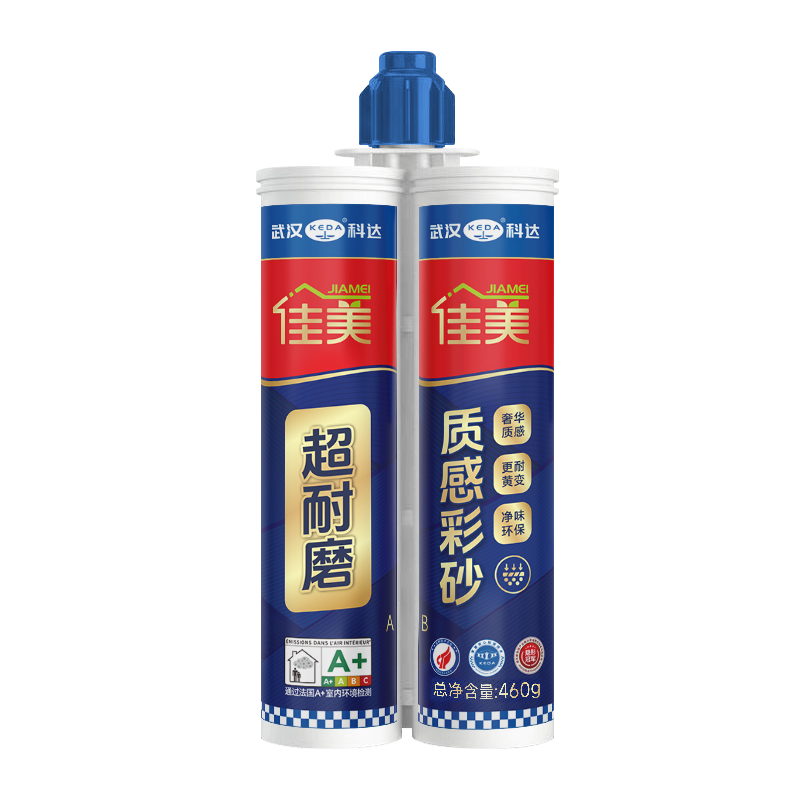
Camry Carbon Ring Mildew-proof Color Sand Sewing Agent
-

Main features
-
- Excellent anti-fouling and anti-mildew function
- Water resistance, abrasion resistance
- Frost resistance and heat resistance
- Safety and environmental protection
-

Product Certification
-
-


-

Color
- Bright White
- Ivory White
- Morning Dew Ash
- Moon Shadow Gray
- Smoke Gray
- Sub-light Gray
- Metallic Ash
- Khakis
- Light Milk Coffee
- Log Sand
- Star Silver
- Noble Silver
-

Product Specifications
-
- 460g
-

Executive standards
-
- Environmental Protection standard: GB 18583-2008 "limit of harmful substances in adhesives for interior decoration materials"
- Q/WKD 011-2024 "American Seam Agent"
Product overview
Jiamei carbon ring mildew-proof color sand sewing agent is a two-component sewing product developed by scientific proportioning, which is made of high-quality polymer resin, special curing agent and special color sand and other functional additives. After curing, the product presents matte color sand effect. Different colors with market mainstream ceramic tiles can create indoor light luxury texture effect.
Product characteristics
|
Characteristic one
|
Matte matte texture, elegant light luxury
|
Characteristic II
|
Aesthetic design color matching, easy to match
|
|
Characteristic three
|
Good stain resistance, easy to deal with life oil
|
Characteristic four
|
Strong cohesiveness, no shedding
|
|
Feature 5
|
Cold-resistant and heat-resistant, suitable for floor heating rooms
|
Feature 6
|
Green environmental protection, through the French A certification
|
Scope of application
interior tile beauty seam
Mildew-proof trim
for kitchen countertops, cabinets, water basins, etc. Waterproof sealing of bathroom bath counter, bathtub, toilet, etc.
Construction operation
1. Joint and Surface Cleaning
Use tools such as a joint cleaning cone or a scraper to pre-clean oil stains, loose materials, and other contaminants from the tile joints. Then sweep the joints with a bristle brush to ensure the tile joints and their surrounding areas are clean, dry, and free of dust, particles, oil stains, loose substances, and other impurities.
2. Material Preparation and Installation
Cut a professional mixing nozzle with a utility knife according to the joint width. Before installing the mixing nozzle, squeeze the sealant tube with a caulking gun until both Component A and Component B are discharged from the outlet. Next, attach the cut mixing nozzle to the outlet and fit it with a high-quality, labor-saving caulking gun specially designed for tile joint sealing. To ensure the joint sealant is mixed evenly, squeeze out and discard the first 20–40 cm of the product from the mixing nozzle before conducting subsequent joint filling work.
3. Joint Filling
It is recommended to apply wax on both sides of the joints or stick masking tape for protection before filling. During the filling process, hold the mixing nozzle at a 45° angle to the tile surface so that the joint sealant can fully fill the gaps. Apply gentle and steady pressure to evenly spread the material into the joints, control the force properly, and move the mixing nozzle backward uniformly—this ensures the tile joints are filled evenly and completely.
4. Joint Smoothing Treatment
To ensure the tile joints are fully filled and form a moderately curved surface after the joint sealant cures, use a dedicated joint smoothing rod or smoothing sheet to pull evenly along the tile joints from one end to the other.
5. Cleaning Treatment
After the joint sealant is fully cured following the filling work, use a cleaning scraper to remove the cured sealant from the tile surface. It is recommended to perform the cleaning 12 hours later (if the construction environment temperature is low, appropriately extend the cleaning time). If the masking tape method is adopted, the masking tape can be peeled off immediately after joint smoothing, and any excess sealant around the joints can be removed.
Precautions
1. During construction, the ambient temperature should be between 5 ℃ and 35 ℃. When the ambient temperature of construction is low, the sewing agent must be soaked and preheated in hot water at 50 ℃ for 10 minutes before construction, and then proceed to the next process.
2. If acid or alkaline cleaning is carried out around the gap, trial construction should be carried out in advance at the corners that do not affect the appearance. After the final appearance meets the requirements, large-area construction
3. should be carried out. 3. For unsealed products that have not been used up, the mixer should be removed within 30 minutes, and the remaining glue on the nozzle should be wiped off and the lid should be sealed for storage
4. Light-colored products have the risk of yellowing under ultraviolet rays, please avoid using them in direct sunlight areas
5. Please keep the unused surplus materials properly, or take them to the hazardous waste disposal point after covering them properly.
FAQ
-
Q
The grout sealant does not cure or cures slowly
-
A
The ambient temperature is too low (below 5℃) or the humidity is too high;
2. The two components of the grout sealant were not mixed thoroughly.
Solution: The construction environment temperature should be maintained at 10-30℃, and the humidity should be below 70%.
2. When applying grout sealant with a glue gun, the glue about 20-40cm at the front end should be discarded and not used for construction, while the glue at the back end can be used normally. 3. If construction has already been carried out, heating (such as a warm air blower) can be used to accelerate curing. If it is severe and does not cure, it needs to be removed and redone.
-
Q
The grout sealant has fallen off and has poor adhesion
-
A
The gaps between the tiles were not cleaned thoroughly (with dust, oil stains and water stains remaining).
2. The gap is too shallow (less than 2mm) or the water absorption rate of the tiles is high;
3. Poor quality or expired grout sealant.
Solution: Before construction, thoroughly clean the gaps with a crack cleaning cone, vacuum cleaner and alcohol.
When the depth of the gap is insufficient, a cutting machine should be used to widen the gap.
3. Choose Kedamai grout and use it within its shelf life.
-
Q
The surface of the grout sealant is uneven and has bubbles
-
A
1. The opening of the glue nozzle is too large or the glue application speed is uneven;
2. The bottom of the gap was not filled firmly, and air remained when the gap was pressed.
3. The thermal expansion and contraction of the tiles cause them to bulge later on.
Solution: The cut of the rubber nozzle is at a 45° bevel, with a width slightly smaller than that of the gap.
2. When applying the glue, push it at a constant speed. Use tungsten steel balls for joint pressing in two steps (first on one side and then as a whole).
3. After curing, the uneven areas should be softened and repaired with a hot air gun or locally removed and redone.
-
Q
The color of the grout sealant has turned yellow and changed
-
A
Light-colored grout sealant oxidizes under ultraviolet radiation.
2. Alkaline materials (such as cement) not drying thoroughly lead to alkali efflorescence.
3. Use strong acid or strong alkali cleaners when cleaning.
Solution: You may consider choosing dark-colored or hydrogenated series grout sealants.
2. Ensure that the base layer is completely dry before construction (with a curing period of more than 7 days);
3. Use neutral detergent for daily cleaning and avoid bleach.
-
Q
The grout sealant cracks and shrinks
-
A
The curing shrinkage rate of the grout sealant is too high.
2. The gaps between the tiles are too wide (more than 5mm) and no layering construction has been carried out.
Solution: 1. Select flexible grout sealant to adapt to expansion and contraction; For wide gaps, it is recommended to apply a base layer of grout first, followed by a surface layer of sealant.
-
Q
The surface of the grout sealant is moldy
-
A
1. Long-term damp environment (such as bathroom) and poor anti-mold property of the grout sealant;
2. Residual moisture during construction.
Solution: 1. Choose grout sealant containing anti-mold components;
2. Ensure that the base layer is completely dry before construction (with a curing period of more than 7 days);
3. Clean the moldy areas with a mold remover. In severe cases, redo the local area.
-
Q
The glossiness is inconsistent
-
A
1. Inconsistent jointing tools or techniques;
2. Uneven temperature during curing.
Solution: 1. Uniformly use tungsten steel joint pressing balls and keep the joint pressing in the same direction.
Avoid excessive temperature differences within 48 hours after construction.
-
Q
The residue is difficult to clean.
-
A
1. The overflow material was not cleaned up in time (the hardness of epoxy resin is high after curing);
2. The surface of the tiles is rough (such as antique tiles) and no masking tape has been applied.
Solution: After the product has fully cured, use a cleaning shovel to remove the cured grout from the surface of the tiles. It is recommended to do the cleaning treatment 12 hours later.
2. For antique-style tiles, it is recommended to apply masking tape or grout wax in advance.
Preventive measures: 1. Pre-construction testing: Conduct a trial test in a concealed area to observe the curing effect and color.
2. Environmental control: Avoid construction on rainy days and in low temperatures;
3. Tool selection: Use professional glue guns and caulking tools;
4. Acceptance criteria: No bubbles, no peeling, and uniform color after curing.
Related Products


WeChat Channels


TikTok